 Back in September my Nexus 7 LTE (2013 model) tablet lost the ability to connect to cellular networks out of the blue while running Android 4.4.3. My network is 3 (in Denmark) and the SIM card works in an iPad. So this is specific for the Nexus 7 LTE. When I browse to:
 Settings->More...->Mobile Networks->Network Operators->Search Networks all I get is “Error while searching for networks”.
 Selecting
 Choose automatically results in “Can’t connect to this network right now. Try again later.”
A lot of people have the same issues with lost cellular connectivity of Nexus 7 LTE tablets.
I have tried the following remedies (none of them worked):
- Factory reset

- Downgrade to Android 4.4.2 (KOT49H)
using the official google factory image (razorg)
- Downgrade to Android 4.3 (JLS36C), using official image
- Re-install Android 4.4.3 (KTU84L) and perform official OTA update (via wifi) to Android 4.4.4
- Airplane mode enable/disable
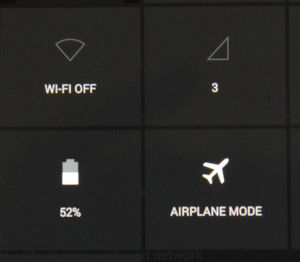
 The airplane switch is somewhat interesting. When airplane mode mode is off, the cellular status reads “No Service”, but when airplane mode is on it reads 3 (my network provider). So the Nexus 7 LTE can at least read my SIM card, how else would it know I am using 3?
According to this thread Google was aware of the issue well in advance of the release of Android 4.4.4 for the LTE model, but did not fix it. That is really lousy customer service by Google and Asus. According to Google tech (in the same thread), we are told to wait for Android L which might be released for the Nexus 7 (2013) model and might fix the issue.
I filed an RMA (return merchandise authorization) with Media Markt today and they will do a repair or replacement of my Nexus 7 LTE under warranty (less than a year old). Now that is good customer service.
 Back in September my Nexus 7 LTE (2013 model) tablet lost the ability to connect to cellular networks out of the blue while running Android 4.4.3. My network is 3 (in Denmark) and the SIM card works in an iPad. So this is specific for the Nexus 7 LTE. When I browse to:
  Selecting
 The airplane switch is somewhat interesting. When airplane mode mode is off, the cellular status reads “No Service”, but when airplane mode is on it reads 3 (my network provider). So the Nexus 7 LTE can at least read my SIM card, how else would it know I am using 3?